VPS Understanding and Best Practices
This guide provides product and UX best practices for VPS (Visual Positioning System). It is intended for developers and product managers before implementing VPS technically. Unlike GPS, which is well known and straightforward to integrate, VPS relies on camera, scans, and specific user flows—understanding this from a client and user perspective will help you design and implement it correctly.
🔍 What is VPS?
VPS (Visual Positioning System) delivers accurate indoor positioning by using the device camera and sensors. It enables reliable indoor navigation and wayfinding by recognizing the environment and tracking the user's movement over time.
At a glance:
- The camera captures the surroundings; images are analyzed to obtain position and orientation.
- A first "scan" is required to get an initial position; the system then tracks movement between scans.
- Re-scans are used when needed to correct drift or restore position.
For technical details on how VPS works under the hood, see the section below. For implementation and API details (setting up the location source, handling states, scanning), see VPS Location Source in your platform docs: Android · iOS · Web.
🔧 How VPS works (technical)
VPS is based on two computer vision technologies developed internally:
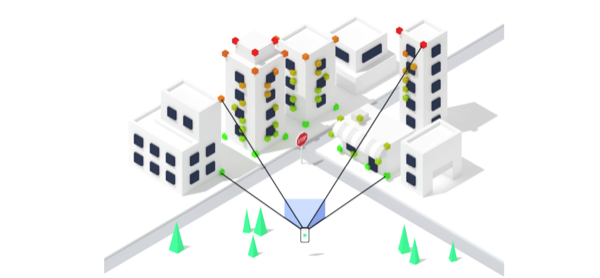
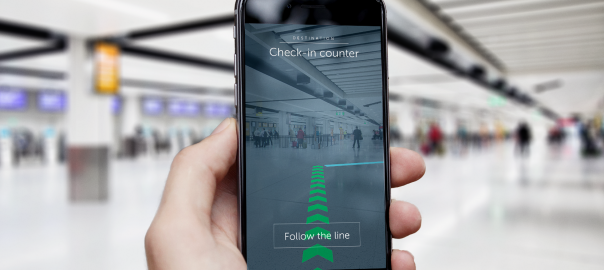
Image Recognition uses a server-based approach where camera images are analyzed on a server to retrieve the precise [absolute] position and orientation of the smartphone.
Images Flow Analysis + Inertial sensors calculate relative displacement between two Image Recognitions. This technology is a fusion of embedded SLAM (Simultaneous localization and mapping) [ARCore/ARKit] and inertial sensors [accelerometer/gyroscope].
Image recognition is what we call a "scan". A scan is required at the beginning of the experience to get the first [absolute] position and then occasionally when the Image Flow Analysis diverges.
Wemap's VPS is proprietary technology developed by Wemap. It is distinct from Google VPS and other off-the-shelf positioning providers. The positioning pipeline, server-side recognition, scan-based workflow, and the overlay that fuses ARCore/ARKit with inertial sensors to correct their drift are all Wemap-owned.
📋 In this page
- What is VPS? – Technology overview and value
- How VPS works (technical) – Image recognition and flow analysis
- User flow overview – End-to-end user journey
- Detailed sections: User onboarding · Permission management · Scanning experience · In-navigation experience · Background scan · Itinerary section below
🔄 User flow overview
The VPS experience is split into two main phases:
- Onboarding and first scan – The user learns what VPS is, grants camera permission, and performs an initial scan to get their position.
- In-navigation – Once position is acquired, the user navigates; the system may report accurate, degraded, or lost positioning and may ask for re-scans or trigger background scans.
End-to-end flow (summary):
- Explain what VPS is and why the camera is needed.
- Request camera permission and handle denial if needed.
- User performs the first scan (point camera at surroundings, follow guidance).
- Navigation starts; positioning can be accurate, degraded, or lost.
- When degraded or lost, suggest a re-scan or rely on background scan when applicable.
- During navigation, handle itinerary recalculation and level changes as needed.
The diagrams below illustrate these two phases. Each step is described in detail in the sections linked at the end of this overview.
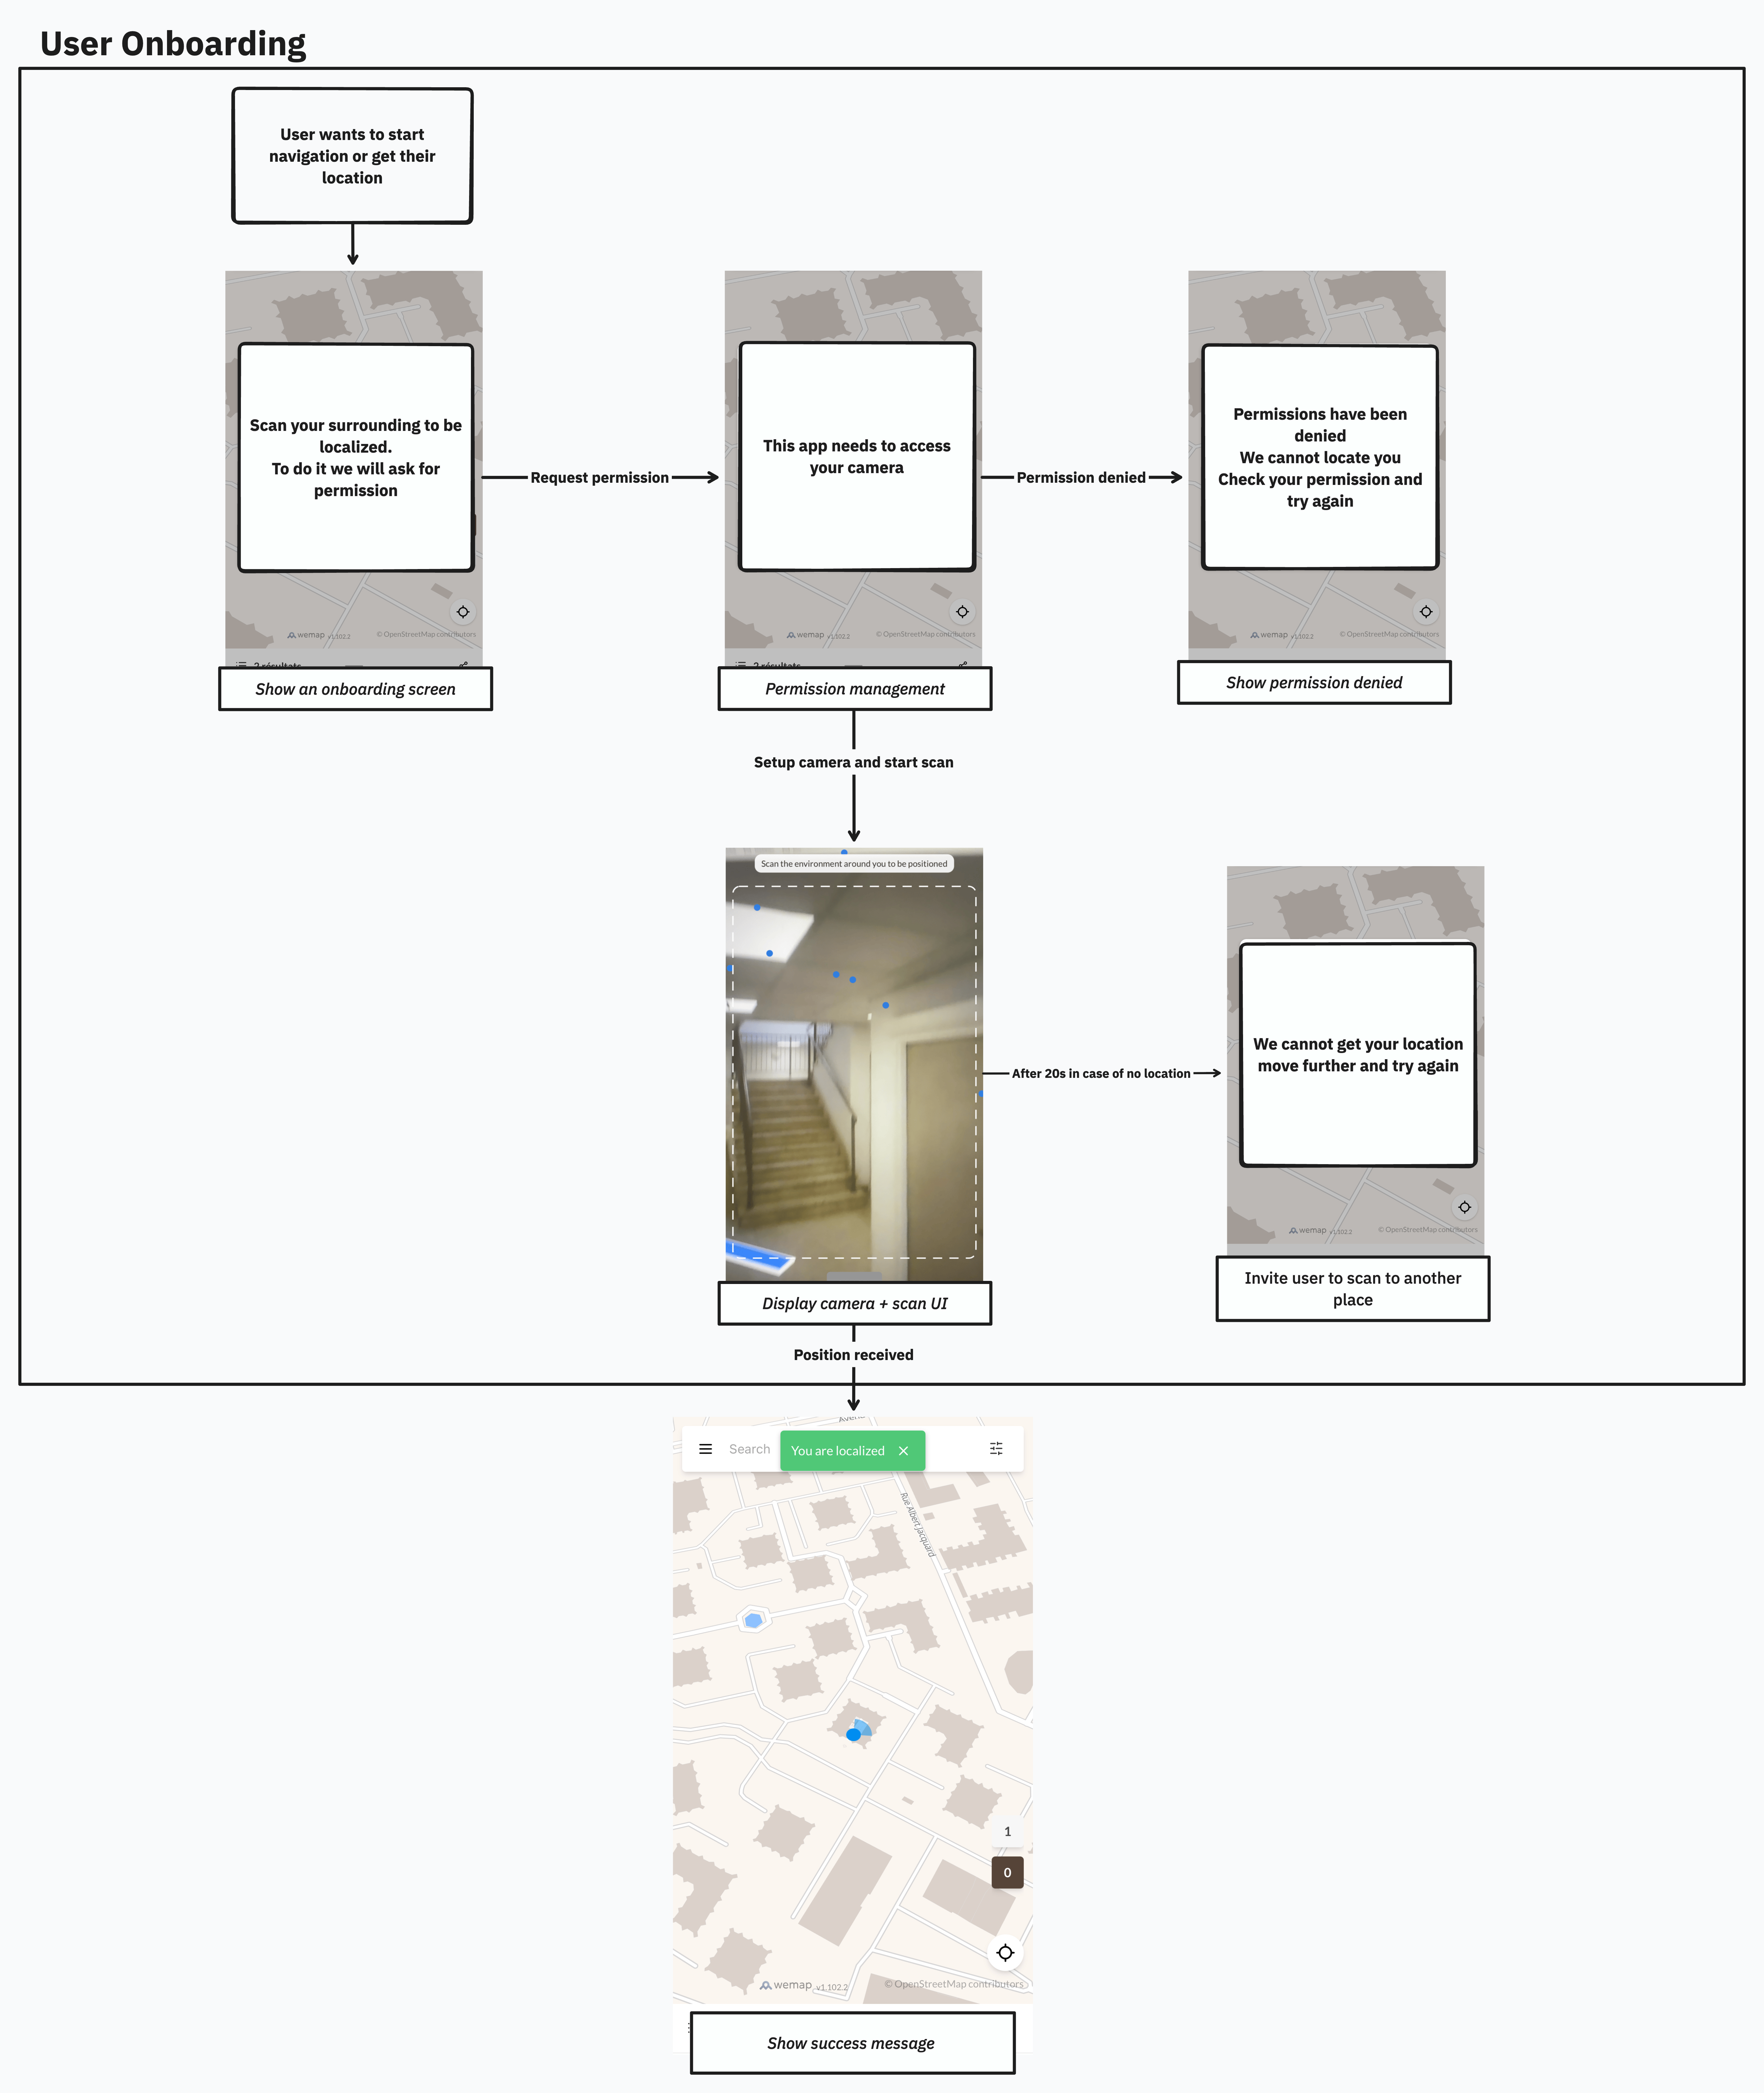
📱 User onboarding and pre-scanning experience
🧭 In-navigation experience
Detailed sections: The following sections go into detail on each part of the flow: User onboarding, Permission management, Scanning experience, In-navigation experience, Background scan, and the itinerary section below.
👋 User onboarding
This section covers how to introduce VPS and request permissions before the first scan.
💡 Explain what VPS is
Before requesting camera permissions, help users understand why VPS is needed and what it does. Users are more likely to grant permissions when they understand the value.
Key points to communicate:
- VPS provides accurate indoor positioning
- It uses the camera to recognize the environment
- It uses the camera and the sensors to follow the user's movement
🔐 Permission management
This section covers the permission request flow and how to handle denial. For implementation (manifest, runtime request, etc.), see VPS Location Source in your platform documentation: Android · iOS · Web.
📝 Request flow
Request permissions in a logical sequence. Ensure the device supports AR (ARCore on Android, ARKit on iOS). See VPS Location Source – Requirements in your platform docs: Android · iOS · Web.
- First, explain why – Show a brief explanation screen before requesting permissions
- Request camera permission – Use clear, contextual messaging
- Handle denials gracefully – Provide clear next steps if permissions are denied
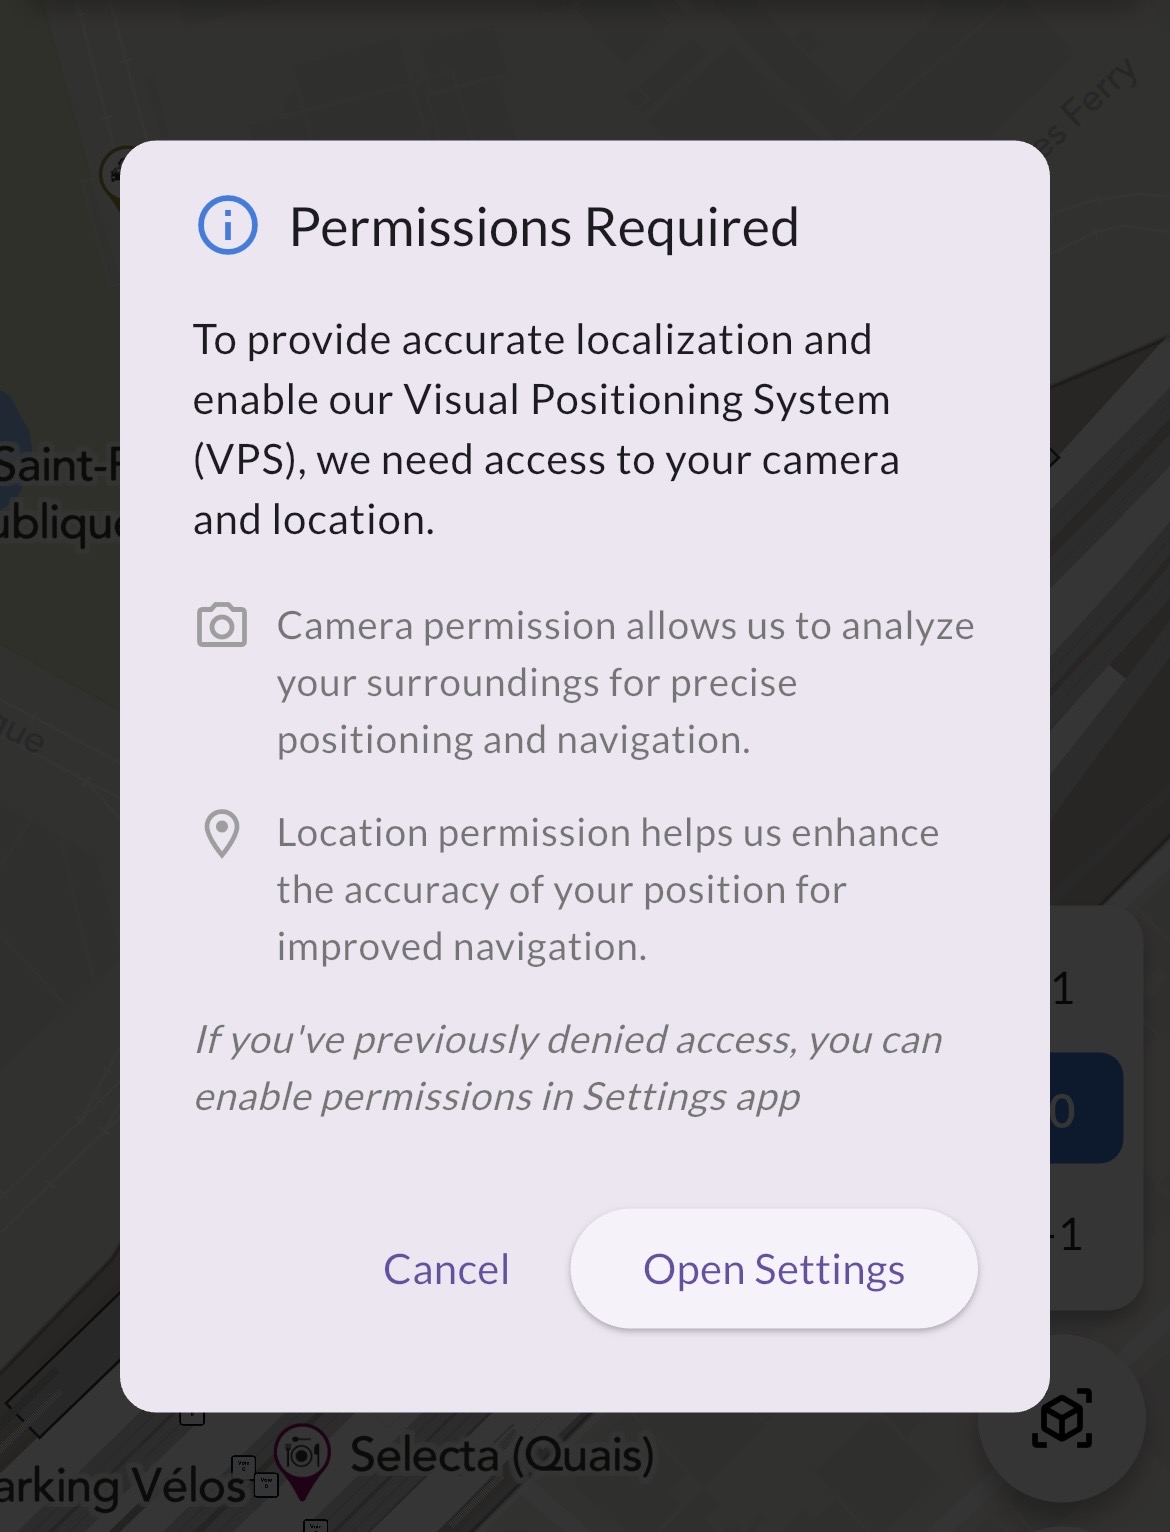 Example of the authorization flow
⚠️ Permission denial handling
If users deny permissions, provide:
- Clear explanation of what features won't work
- Easy path to re-enable permissions in settings
Visual indicators:
- Use distinct visual states for granted/denied permissions
- Show permission status in your UI
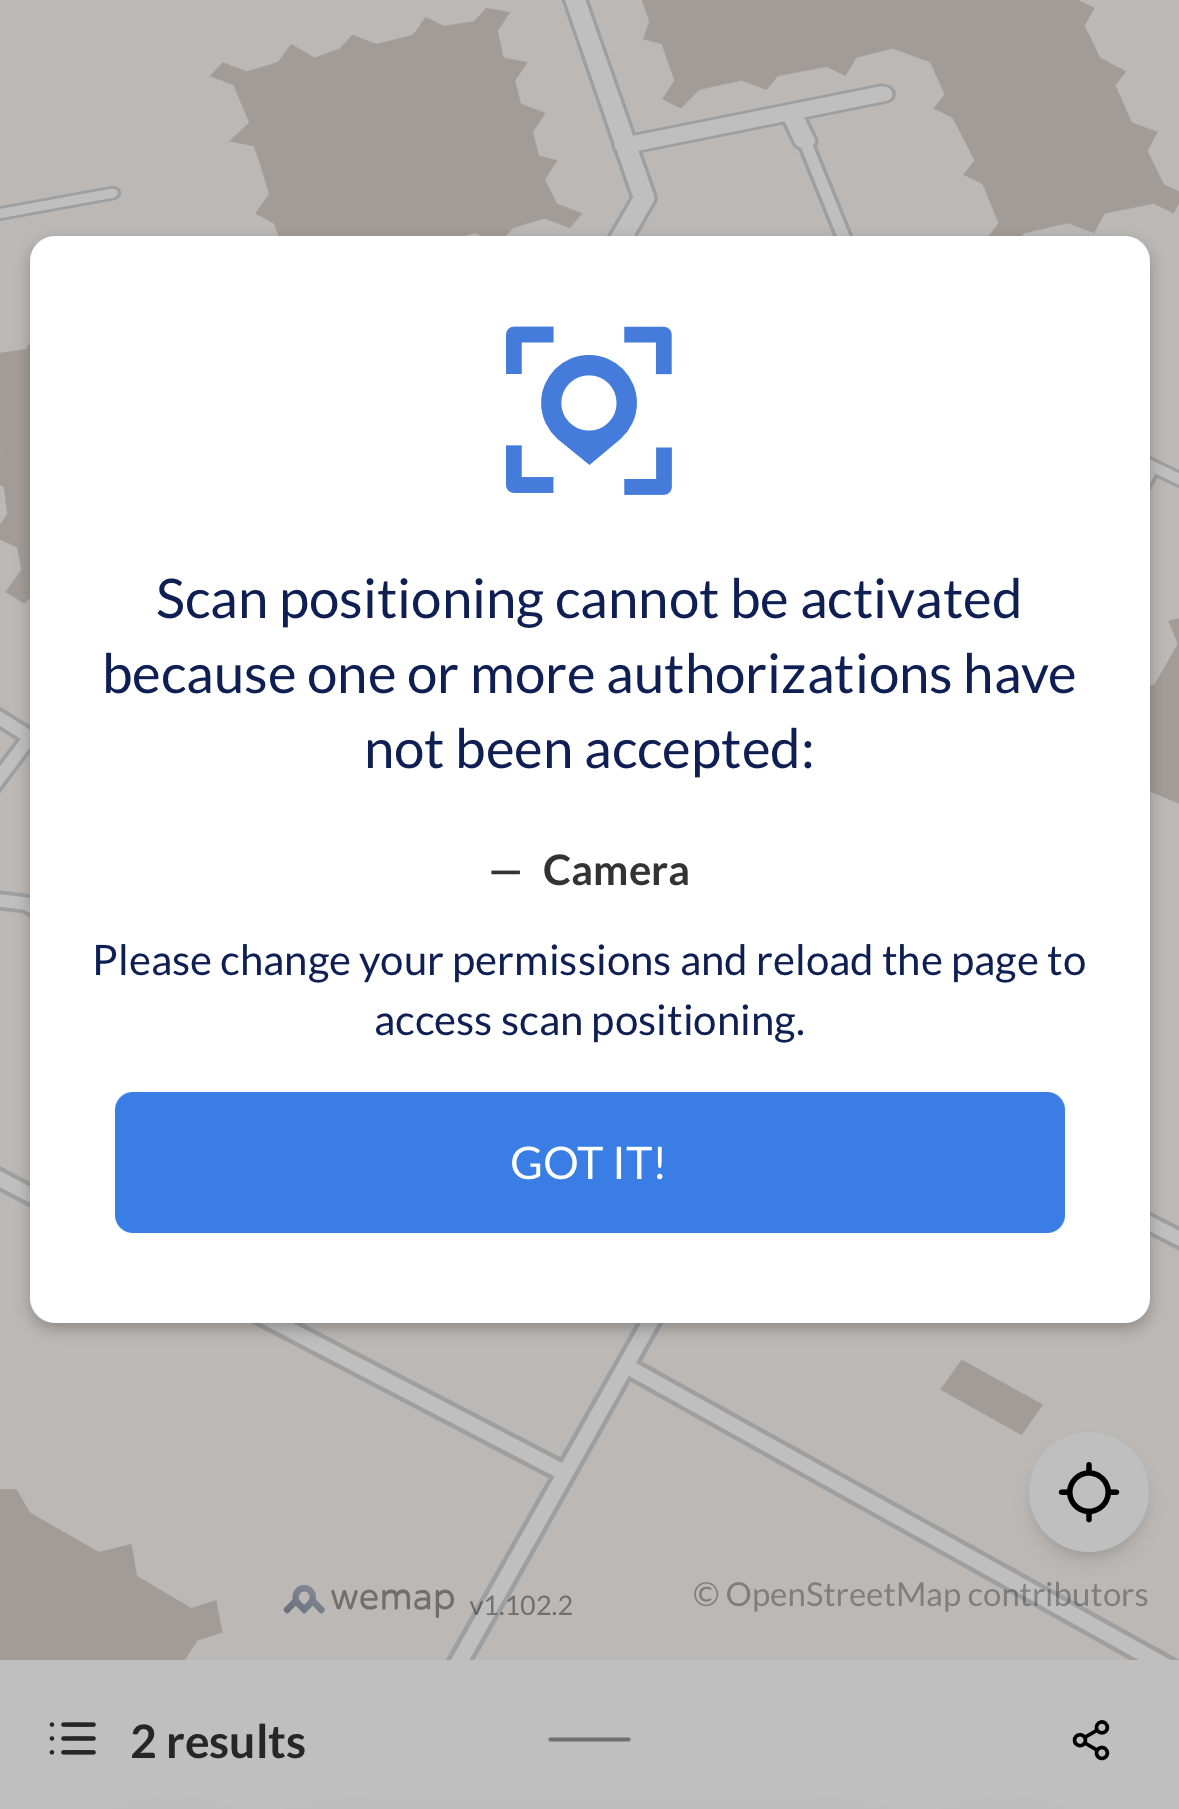 Example of the camera unavailable state
📷 Scanning experience
This section covers visual feedback, error handling, and layout during the scan. To start a scan from code, see Scanning the Environment in VPS Location Source in your platform docs: Android · iOS · Web.
✨ Visual feedback during scan
During the scanning process, users need clear feedback about what's happening:
Loading states:
- Show a clear "Scanning..." indicator
- Use animations to indicate active processing
User guidance:
- Display instructions on screen: "Point camera at your surroundings"
- Show movement guidance: "Move slowly and steadily"
- Provide visual frame guides or targeting indicators to help users aim the camera
Scan duration:
- Set expectations: "This will take a few seconds"
- Provide feedback when scan completes successfully
Example of the scanning interface
⚠️ Scan error handling
Various errors can occur during the process of scanning. Here are the most common ones:
- Wrong phone tilt angle
- No internet connection
- Connection timeout
- Slow internet connection detected
The VPS system needs well textured surfaces to work properly. So if the scan takes longer than expected (approx. 5 seconds), you can suggest that the user point the camera at a different location. If any of these errors occur, we recommend showing a small hint to the user about what they can do to fix the issue.
Example of label to display: "Slow connection detected, please check your internet connection and try again"
📐 Layout recommendations
Camera container placement:
- Consider fullscreen mode for initial scan to maximize camera view
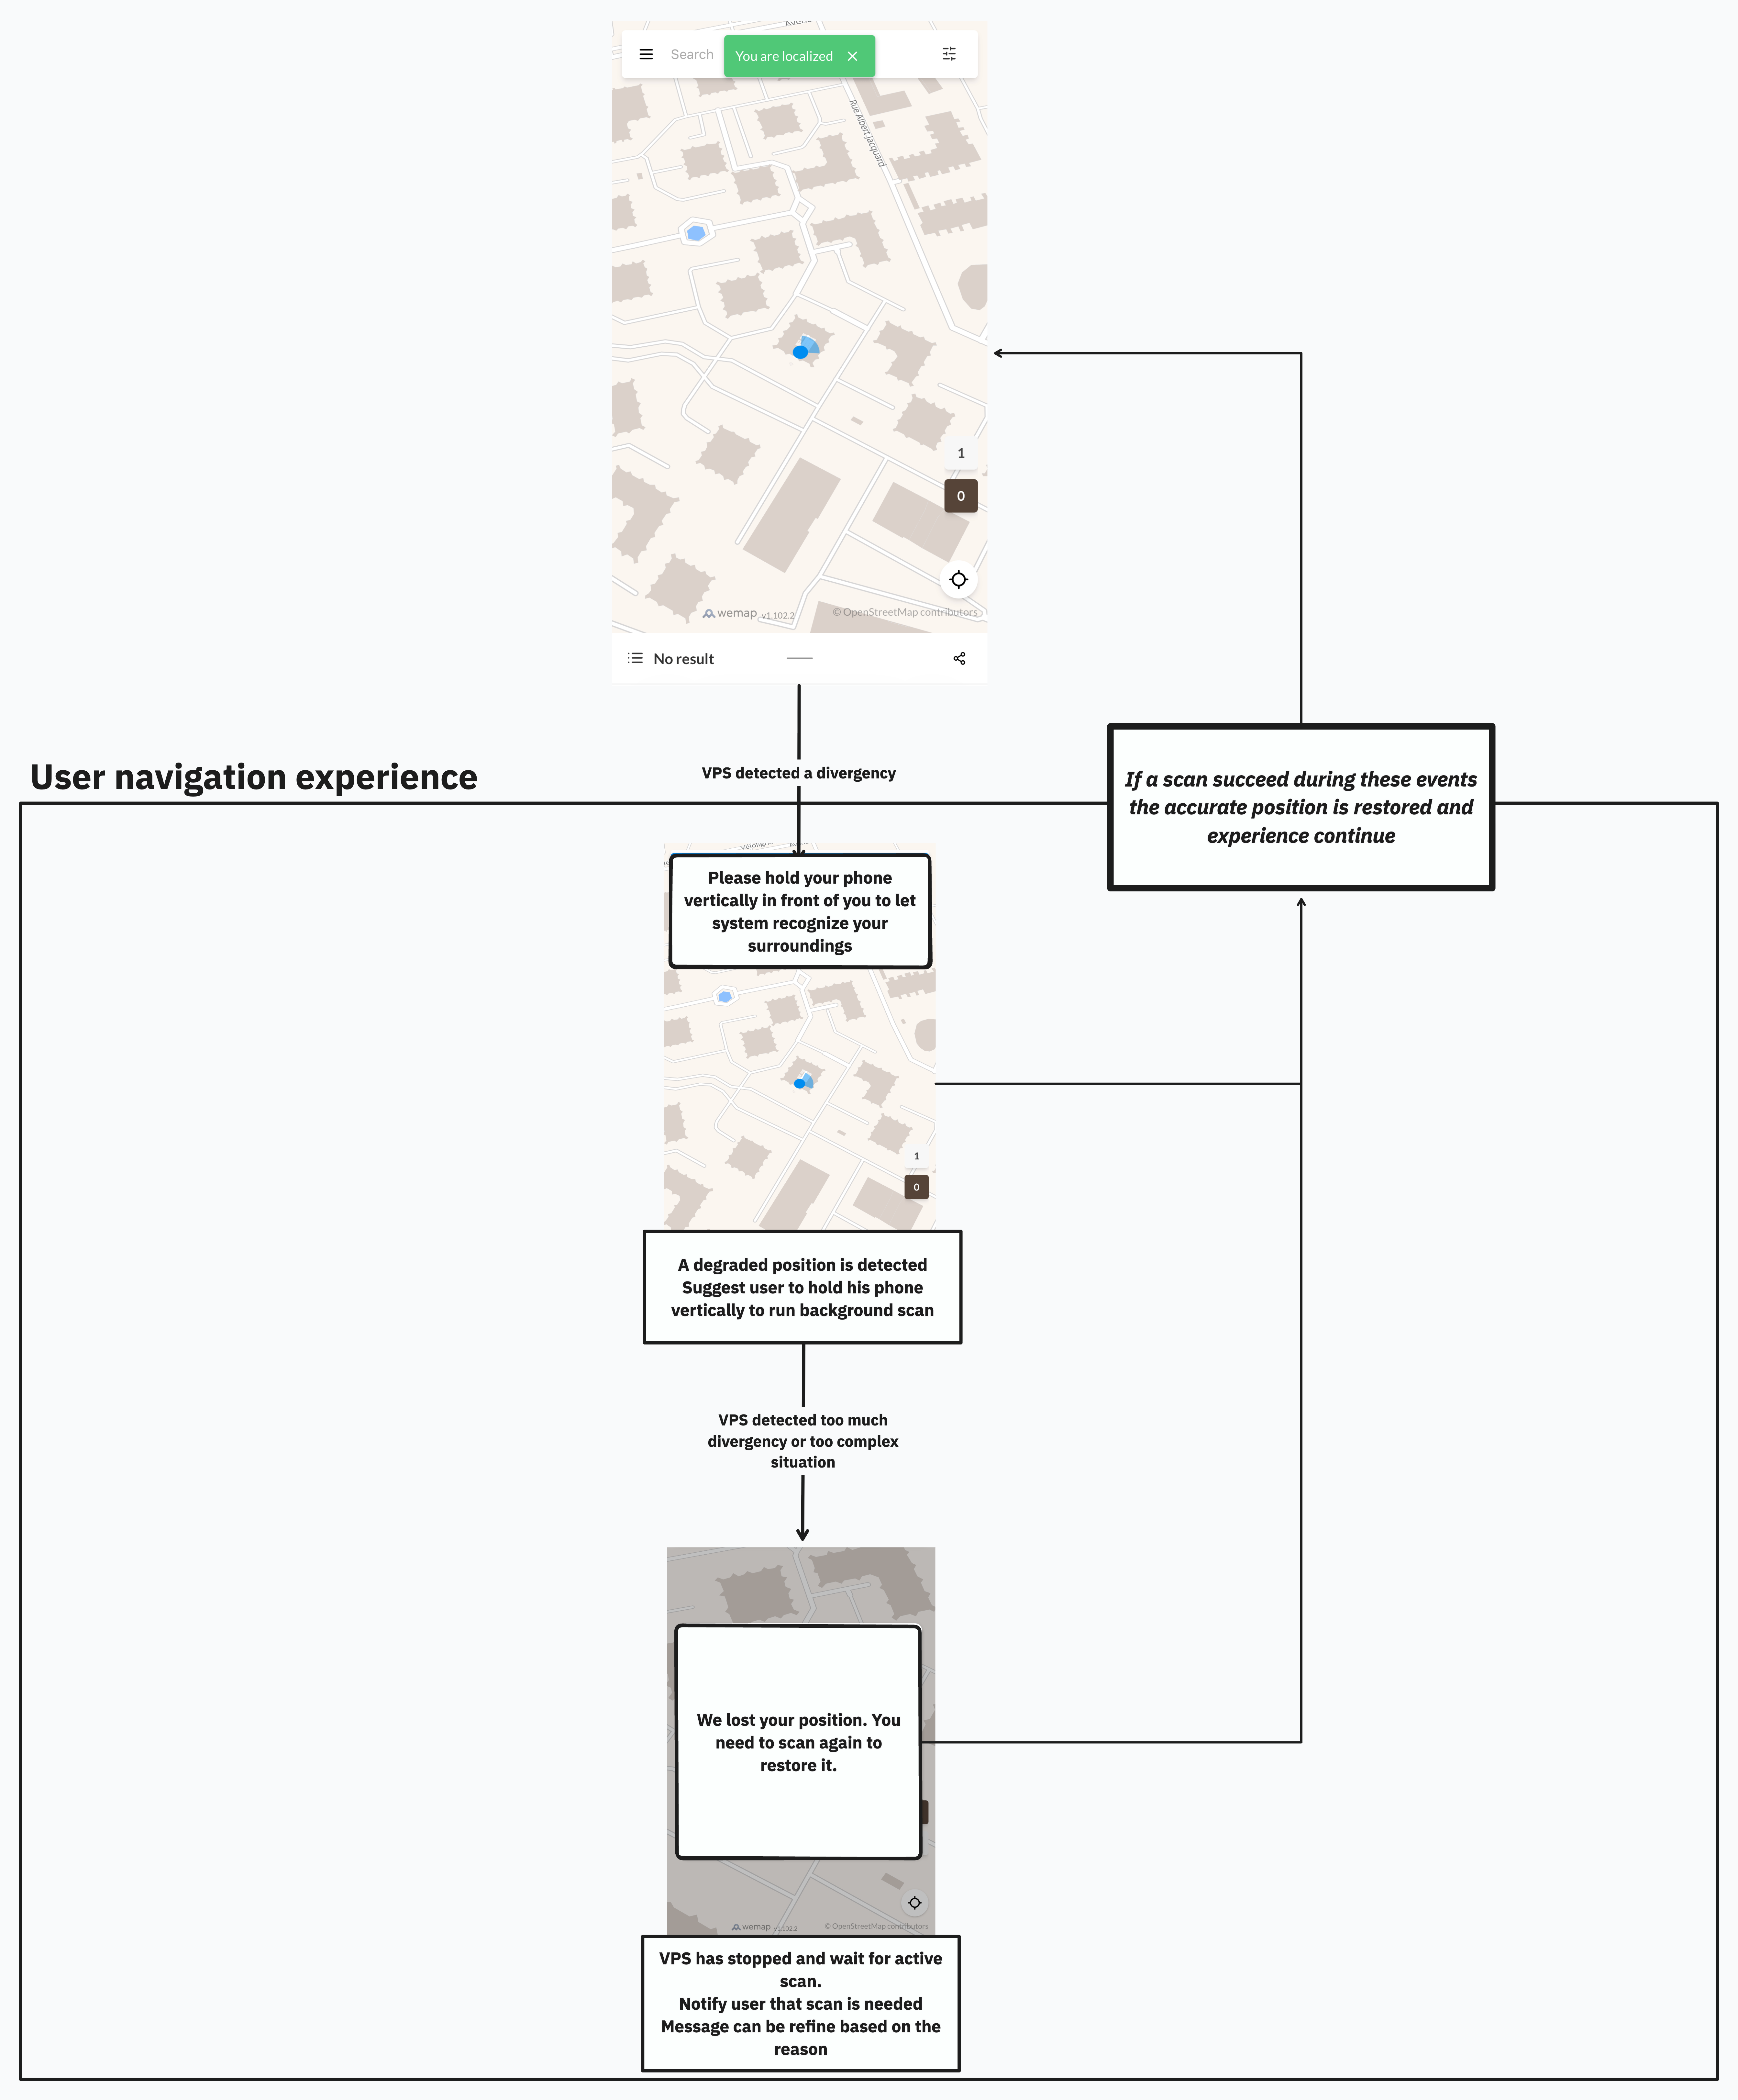
🧭 In-navigation experience
This section describes positioning states, when to trigger scans, and how to guide the user during navigation. To handle these states in code, implement Handling Location Source State Changes in VPS Location Source in your platform docs: Android · iOS · Web.
The positioning system has several states to inform you about the current positioning status.
✅ Accurate positioning
The user location tracking is accurate and there is no need to suggest a re-scan at this stage.
⚠️ Degraded positioning
The user location tracking is limited for various reasons. A scan is recommended, but not mandatory, to restore the ACCURATE_POSITIONING state.
Degraded positioning is triggered when:
- The user walks for 75 meters (default value) without any re-scan (manual or background).
- ARKit/ARCore tracking is limited for any reason
We recommend a small impact in the UI when this state occurs suggesting user to hold their phone vertically in front of them to let the system recognize their surroundings. We also recommend to add a vibration feedback to the user to indicate that the system needs its attention.
Example of label to display: "Please hold your phone vertically in front of you to let system recognize your surroundings"
❌ Not positioning
The system has not yet recognized the environment and a VPS scan is required, or the system has lost the position. When this state occurs, the blue dot will automatically become grey on the map.
Not positioning is triggered when:
- The user hides the app.
- The user walks for 150 meters (default value) without any re-scan (manual or background).
- The user goes too far from the itinerary.
- The user stops the location source or it is stopped automatically.
- ARKit/ARCore tracking failed
- Conveyors are detected and automatic level change is not possible.
- Something went wrong during conveying and it fails at the end of the conveyor.
For SDK version 0.27.0 and above you should use the NOT_POSITIONING state to trigger a manual re-scan because position will be lost if the user walks for 150 meters (default value) without any re-scan (manual or background).
We recommend showing a hint to the user that they need to scan again to restore the position.
Example of label to display: "We lost your position. You need to scan again to restore it."
For a level change reason, the message should be more specific and ask user to re-scan after the level change.
Example of label to display: "We lost your position because you changed level, you need to scan again when you finished the level change."
🎯 When to trigger scans
Initial scan:
- Trigger when the user wants to start navigation or get their location
Manual re-scan:
- Suggest the user scan again when the position is inaccurate
- Ask the user to scan again when the position is lost
Background scan:
Background scan is automatically triggered by the system based on a variety of different conditions. For more details, refer to Background scan.
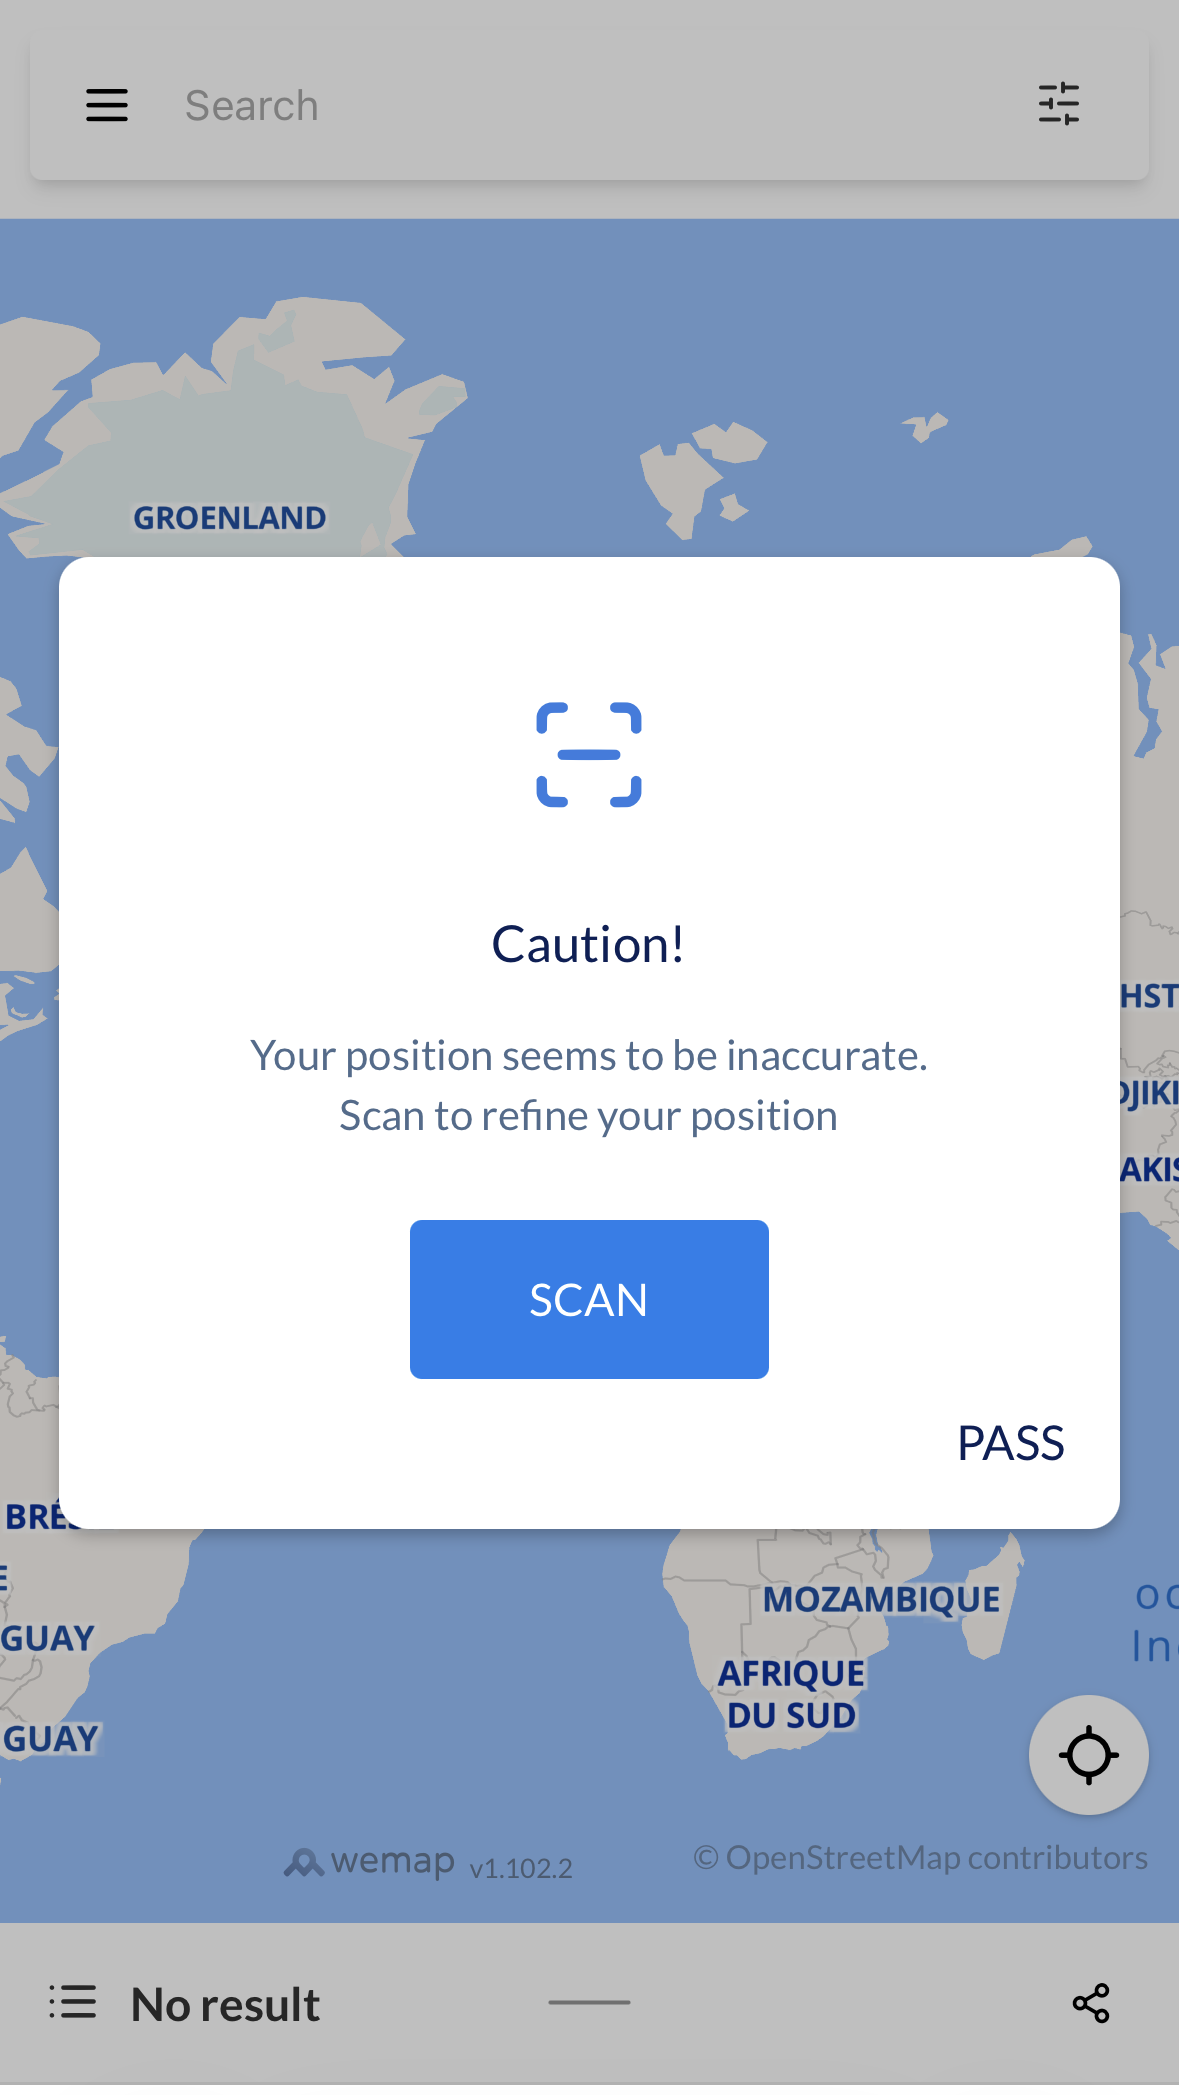 Example of the re-scan suggestion
When scan succeeds:
- Show clear success indicator (checkmark, success message)
- Confirm position found
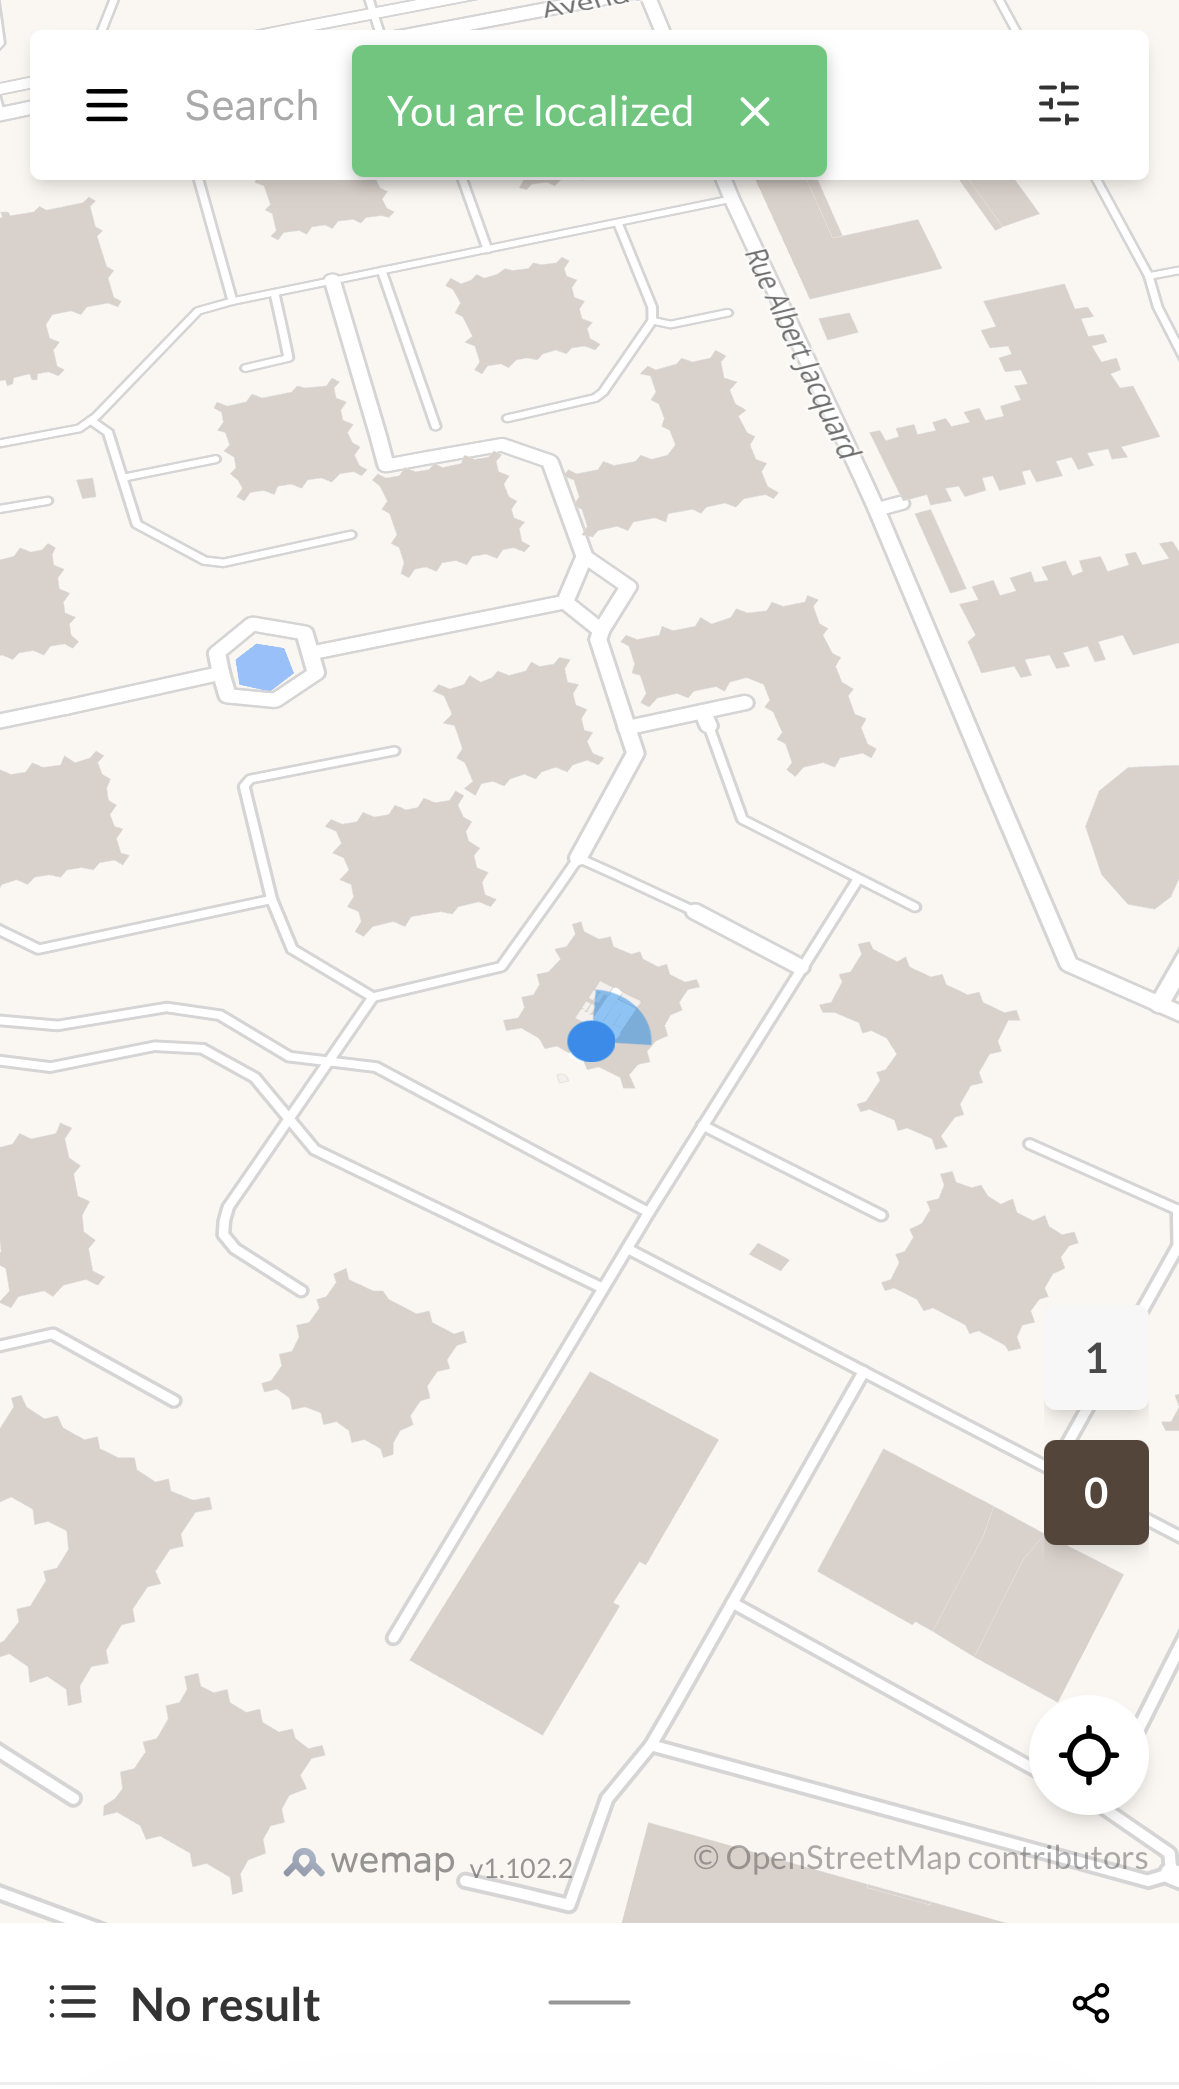 Example of the position received
🔄 Background scan
In addition to scans initiated by the user, the system can sometimes self-initiate a background scan in an attempt to improve user tracking. For how to react to background scan events in code, see Background scan in VPS Location Source in your platform docs: Android · iOS · Web (not yet available, but comming soon).
⏰ When background scan is triggered
- Time-based condition: if the last successful scan was more than 30 seconds ago (default value)
- Distance-based condition: when a degraded state is triggered – which means that the user has walked 75 meters (default value) without any re-scan (manual or background).
Important note: background scan images are only sent to the server when the phone is perpendicular to the ground (inclination of at least 80 degrees).
The system informs you that a background scan has started. You can use this information to show a small hint to the user when the position is degraded: they need to hold their phone vertically in front of them to let the system recognize their surroundings.
Example of label to display: "Please hold your phone vertically in front of you to let the system recognize your surroundings"
🗺️ Itinerary
To ensure a seamless navigation experience, the user's location must be accurate before starting navigation. For how to assign an itinerary to the VPS location source in code, see MapMatching (Assigning an Itinerary) in VPS Location Source in your platform docs: Android · iOS · Web. If the VPS positioning state is not accurate, prompt the user to perform a scan to refine their position. Only allow navigation to begin once the device has obtained an accurate position. This prevents misguidance and improves user trust in the navigation system.
🔄 Recalculation
When the user goes too far from the itinerary, the system recalculates the route so they stay on the correct path. A recalculation is only triggered at least every 5 seconds (default value) and only if the user has moved away from the area (15 meters) where the last recalculation started.
If the user is too far from the route but the system cannot recalculate (for example because positioning is in a degraded state and a new scan is needed), the location state is set to NOT_POSITIONING so the app can ask the user to scan again.
📚 Examples
For sample implementations of Wemap SDKs with VPS and positioning, see the official repositories:
- Android: wemap-sdk-sample-apps-android — e.g. Map+Positioning sample
- iOS: wemap-sdk-sample-apps-ios
Clone the repository for your platform and follow the README to run the sample application.